Quick Takeaway
- You can grow fresh, nutrient-rich sprouts at home in just 3–5 days—no garden needed
- Sprouting boosts vitamins, antioxidants, and digestibility by activating natural enzymes
- All you need is a jar, a lid or cheesecloth and rubber band, water, and sprouting seeds to get started
- Rinse daily and drain well to keep sprouts fresh, safe, and bacteria-free
What if one of the most nutrient-dense foods you could eat took less than a week to grow… and required no garden at all?
Sprouts are tiny, powerful, and surprisingly easy to grow right on your kitchen counter. With just a jar, some seeds, and a little water, you can grow fresh, living food in as little as 3–5 days, depending on the seed.
Let’s dig into the “why” (of course) and exactly how to do it.
Why Grow Sprouts at Home? (Tiny Seeds, Big Nutrition)
Sprouts are seeds that have just begun to grow—caught at the moment when their nutrient potential is peaking.
Here’s why they’re worth your attention:
- Nutrient-dense: Sprouting increases levels of vitamins like C, B vitamins, and antioxidants. For example, Emily Ho, nutrition professor and director of the Linus Pauling Institute at Oregon State University in Corvallis, stated in a 2022 American Heart Association article (Heart.org) that “Five- to seven-day-old seed sprouts can often offer more nutrition benefits than the mature plants.”
- Budget-friendly: A small bag of seeds can produce multiple batches. Take good care of your Jars and lids and they will last a long time.
- No garden needed: For the most part, grow them year-round, indoors. I do not have air conditioning, so there are some times during the summer that I skip sprout growing because it is too warm in the house.
- Fresh on demand: No more wilted greens in the fridge. In fact, there are many times that I prefer them to lettuce on a sandwich or salad.
It’s one of the simplest ways to add fresh, living nutrition to your meals.
What Happens When a Seed Sprouts? (The Science)
When you add water to a seed, it “wakes up.”
This process—called germination—triggers a cascade of changes:
- Enzymes activate, breaking down stored nutrients
- Anti-nutrients decrease (like phytic acid, which can block mineral absorption)
- Nutrients become more bioavailable, meaning your body can use them more easily
In short: sprouting transforms a dormant seed into a more digestible, nutrient-rich food.
Best Seeds for Sprouting (Beginner-Friendly Picks)
Easiest Sprouts to Start With
If you’re new to growing sprouts, start here:
- Broccoli sprouts (my favs for their nutrition powerhouse qualities)
- Alfalfa (mild and versatile)
- Radish (peppery and fast-growing)
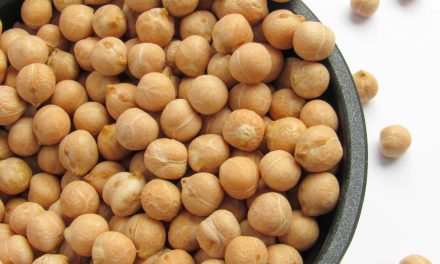
- Lentils (hearty and filling)
- Mung beans (great for stir-fries)
Seeds to Avoid
Not all seeds are safe to sprout:
- Seeds labeled “treated” or non-food grade
- Certain beans like raw kidney beans (can be toxic when sprouted improperly)
Look for seeds specifically labeled “sprouting seeds.”
Important! Growing and Using Sprouts Safely
Growing Sprouts:
Because sprouts grow in warm, moist environments, they can pose a food safety risk if handled improperly, including Salmonella, E. coli, and Listeria monocytogenes.
- Always use clean equipment
- Rinse regularly and thoroughly
- Ensure proper drainage and airflow
- Discard if there’s any off smell or slimy texture
Using Sprouts:
Always wash sprouts thoroughly prior to eating them. (This is an excellent practice for any raw produce.) This Medanta article also suggests soaking (cleaning) seeds with pure vinegar for 15 minutes to reduce food poisoning risk. This practice was discovered during my sprout research, and I will try this in my next sprout run. As long as the seeds still sprout, I think it will be worth the extra step.
Sprouts are nutrient-packed—but their warm, moist growing conditions can also harbor harmful bacteria. High-risk groups like young kids, older adults, pregnant women, or anyone with a weakened immune system should skip them raw.
Which leads to another way to reduce the chance of encountering these bacteria — by cooking sprouts by sautéing, lightly steaming or lightly stir frying. According to Medanta (n.d.), Sprouts: Raw vs cooked—Nutrition value and health benefits, you may loose some of the Vitamin C and B Vitamins, but if cooked just lightly you will retain many of the minerals, kill harmful bacteria, and make the sprouts easier to digest.
(Food safety agencies emphasize careful handling of raw sprouts due to potential bacterial contamination (U.S. Food and Drug Administration, 2023; Centers for Disease Control and Prevention, 2024))
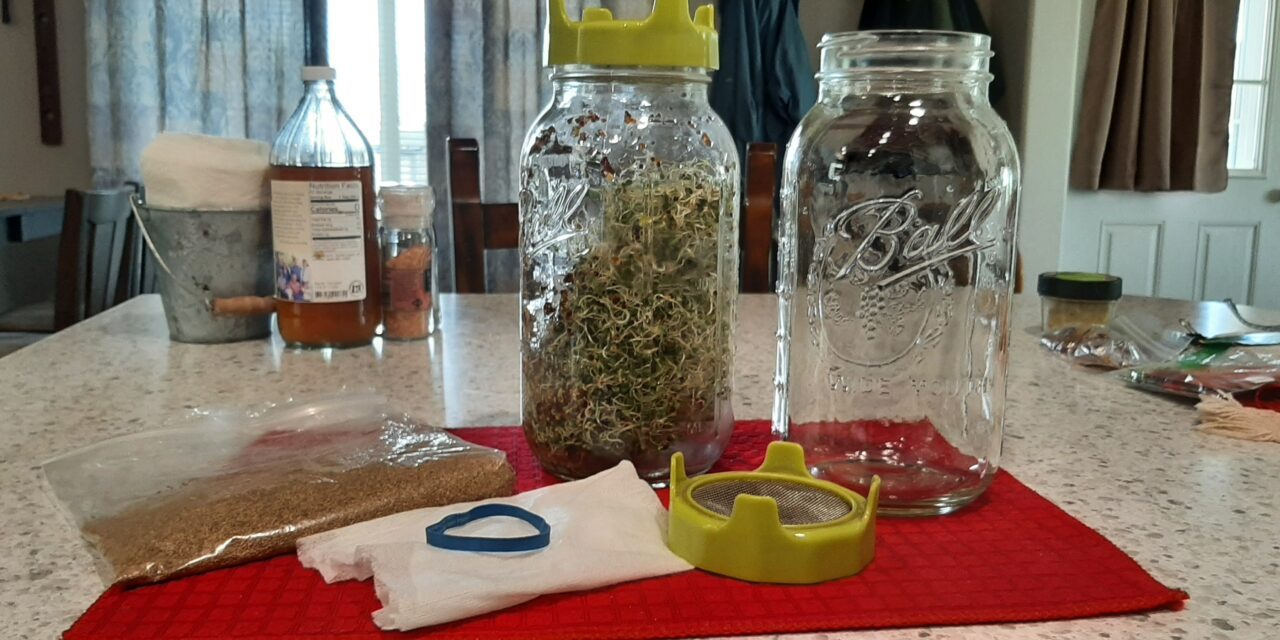
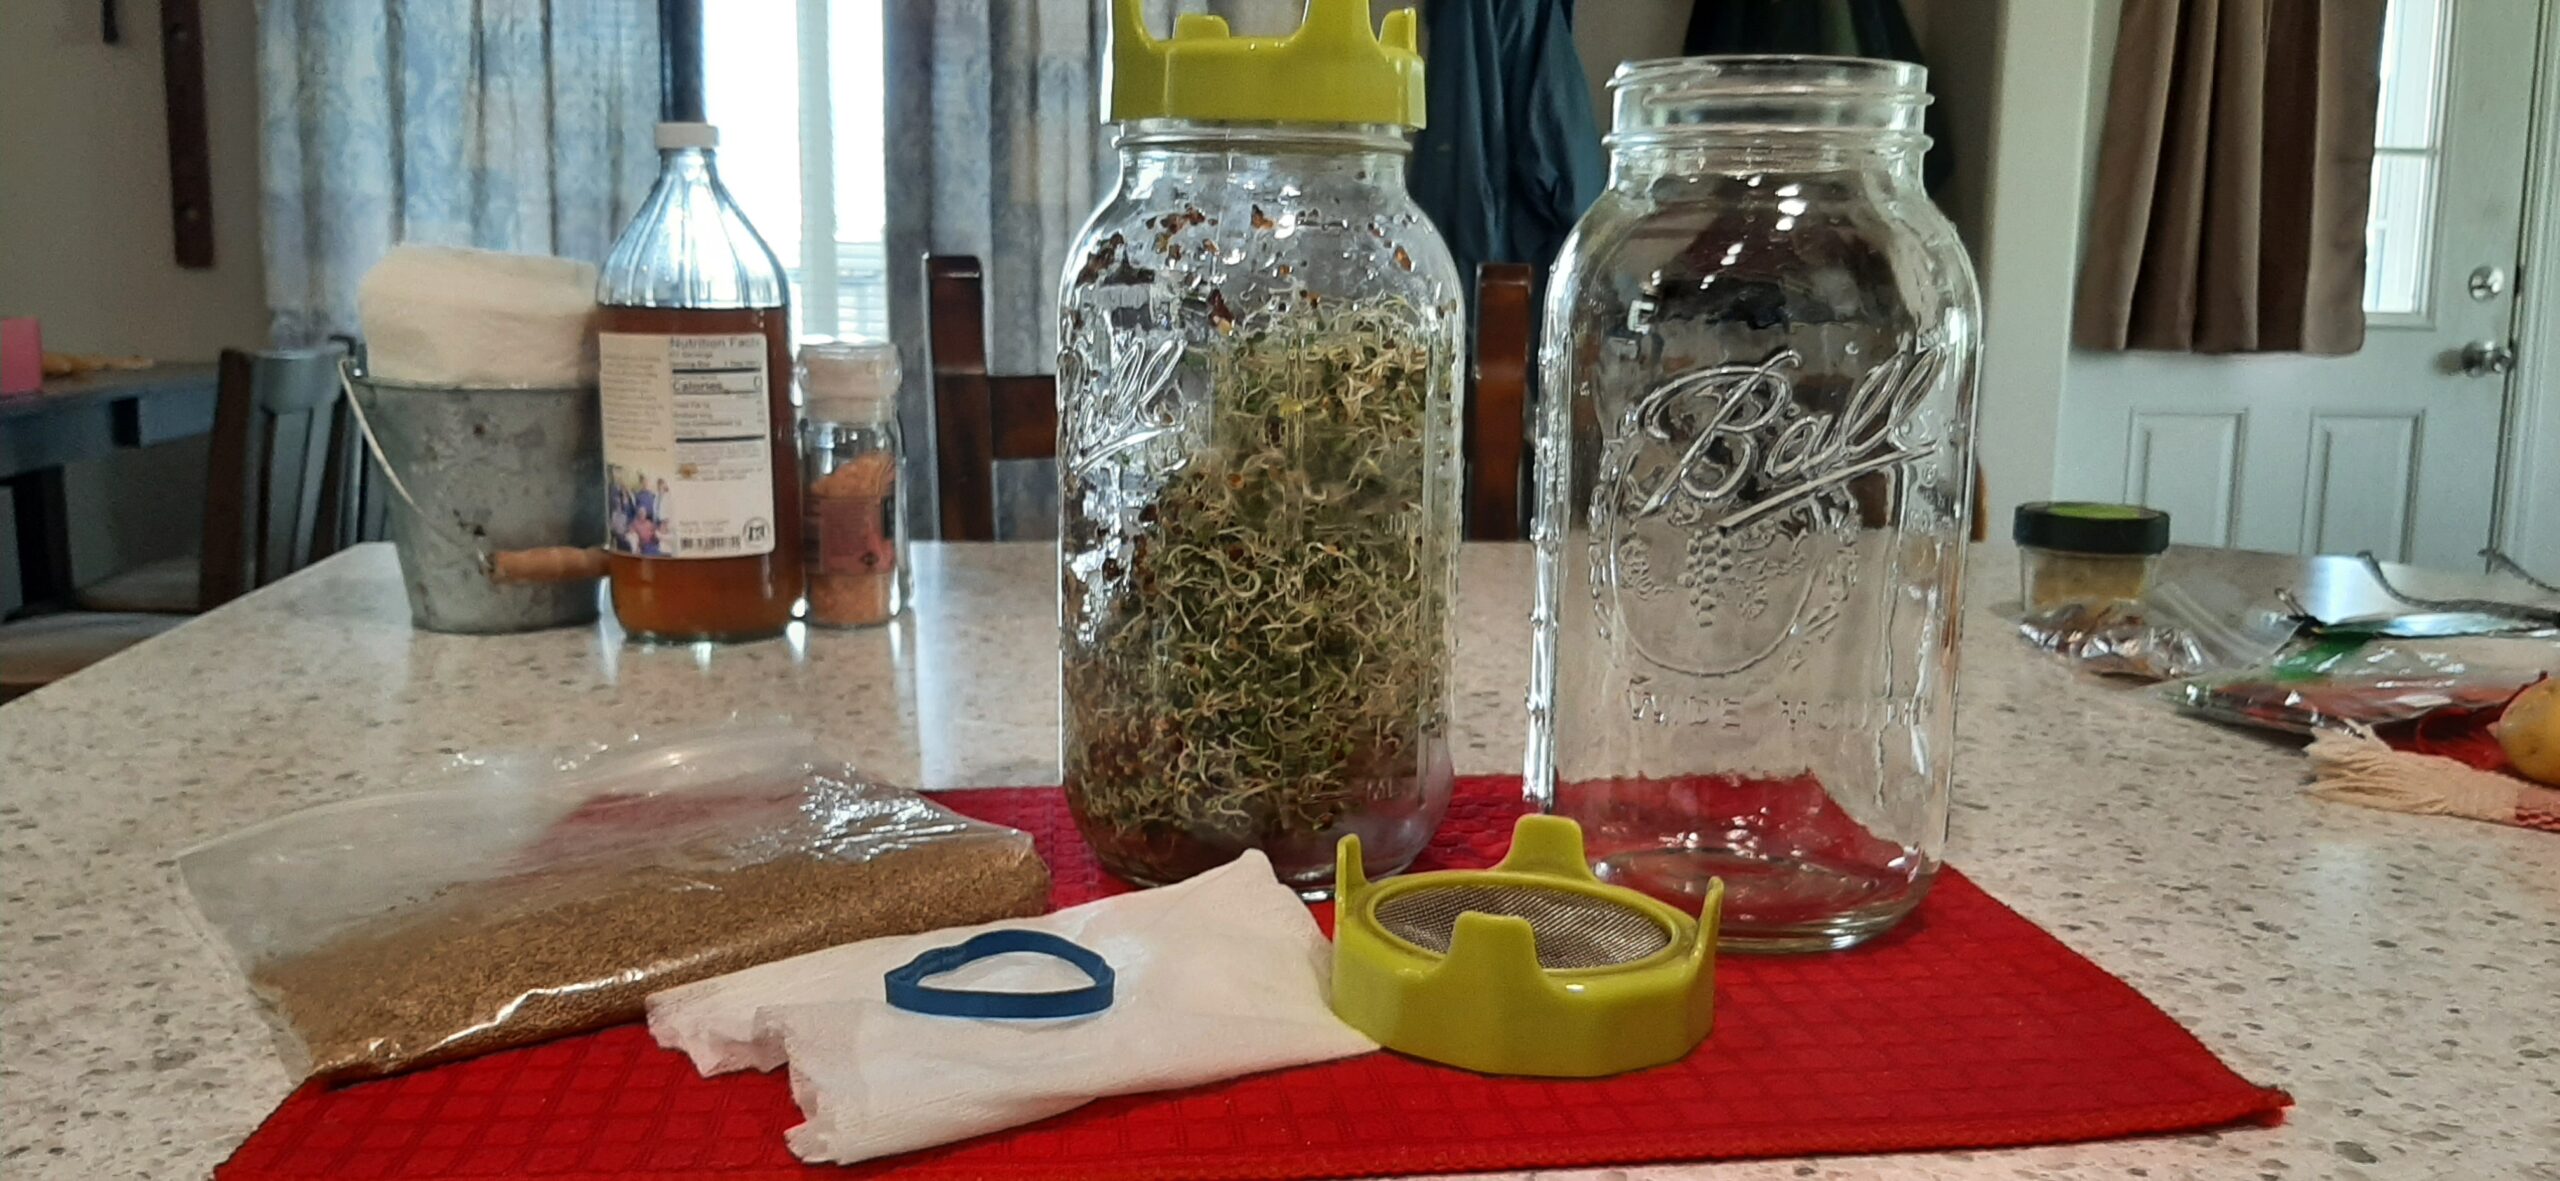
What You Need to Grow Sprouts at Home
You don’t need anything fancy. You may need to purchase a few things like the mason jars if you do not currently have them. I would definitely recommend the mesh lids, but go ahead and get started with some cheesecloth or other clean thin cloth (that will drain water well) and whatever clean glass jar you can find. I’ll add links in a few items that follow for you. (These are Amazon affiliate links that I’ve put together to help you find supplies. Prices are always the same as if you searched on your own.)
- A mason jar – either quart size or 64 ounce (1/2 gallon). I prefer 1/2 gallon size so sprouts have room to breathe and grow.
- A mesh lid or cheesecloth + rubber band
- Clean, filtered water
- Sprouting seeds (organic preferred)
- A sturdy bowl or rimmed plate for draining sprouts
That’s it. No soil. No garden. No full sun or gardening experience required. Just daily rinsing and draining, with some filtered sun to green things up.
Printable Instructions:
Growing Sprouts
Equipment
- OR Cheesecloth
- A sturdy bowl or rimmed plate for draining sprouts
Ingredients
- 1-2 tbsp sprouting seeds your choice
- clean water to fill and then rinse
Instructions
Day 1: Soak your seeds
- Using a clean mason jar, quart size or 1/2 gallon, add 2 tsp seeds for quart size, 1 1/2 tablespoons seeds for 1/2 gallon size.
- Fill with a few inches of water, cover jar with mesh lid or cheese cloth/rubber band and store in a dark cool place (like your pantry) for 6 – 12 hours depending on seed size. Small Seeds (Broccoli, Alfalfa, Clover): 6-8 hours. Legumes (Lentils, Mung Beans, Chickpeas): 8–12 hours. Do not over soak.
Days 2: Rinse and Drain Soaking Water
- Drain the soaking water. Rinse, swish, and drain seeds 2 to 3 times. Shake out water from the sprout jar and place upside down in a sturdy bowl or rimmed plate to allow residual water to drain out.
- Store jar tilted upside down for airflow in a cool, dark place (like your pantry). You can also store horizontally. You are looking good airflow here.
- Rinse, swish, and drain again another 1 to 2 times on day 2.
Days 3 – 4: Rinse and Drain 2 – 3 times per day.
- Rinse and drain 2 – 3 times per day as you did on day 2.
- Each day check the sprout length. If the sprouts need more sprouting time (less than an inch, no real leaves showing), put them back in your cool, dark storage location after rinsing and draining, again tilted upside down for airflow or lay horizontally. They should be ready for a little light by day 4, but depending on the seed, that could happen a little sooner.
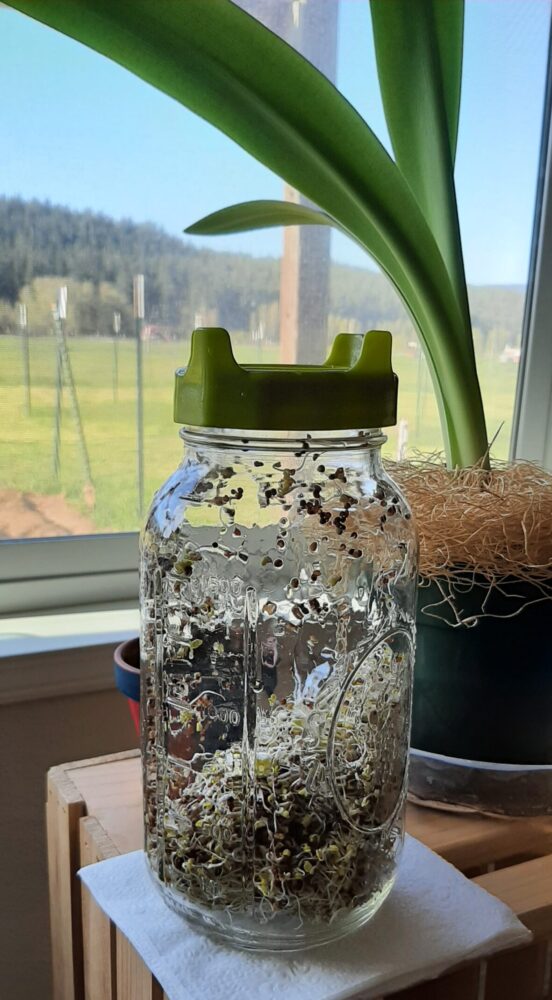
- When the sprouts are about 1 inch or more in length and show small leaves, it's time to give them a little light. Place in indirect light, never on a hot window sill.
- Whether the sprouts are getting some light or were placed back in storage, rinse with fresh water 2–3 times per day. And again, always drain thoroughly.
Day 5: Harvest
- Once sprouts have had a little time to green up, give them a rinse. Let them dry before storing in the refrigerator. Use within 3 – 5 days.
Final Thoughts: Start Small, Grow Something Powerful
There’s something quietly amazing about turning a handful of seeds into fresh food in just a few days.
No garden. No complexity. Just curiosity—and a jar on your counter.
FAQ: Growing Sprouts at Home
How long do sprouts take to grow?
Most are ready in 3–5 days, depending on the seed.
Do sprouts need sunlight?
Nope. They grow perfectly well in indirect light or even a dim kitchen. In fact, it is best not to leave them in direct sunlight as they may get too hot.
Can you grow sprouts without a jar?
Yes—sprouting trays or containers work too, but jars are easiest for beginners.
How do you store sprouts after harvesting?
Keep them in the fridge in a breathable container. You can even keep them in the growing jar with the breathable, mesh lids. Buy extra lids and jars so you can get another batch started! Best used within 3–5 days.
What are common mistakes and how do I fix them?
A few things can go wrong—but they’re easy to avoid:
- Using the wrong seeds → Choose sprouting-safe varieties
- Over-soaking seeds → Stick to recommended times: Small Seeds (Broccoli, Alfalfa, Clover): 6-8 hours. Legumes (Lentils, Mung Beans, Chickpeas): 8–12 hours.
- Poor drainage → Always drain fully
- Not rinsing enough → Aim for 2–3x daily
Can you suggest good sprout growing supplies?
Yes—sprouting trays, kits, and seeds can be found in my curated list here: https://a.co/d/03rGpE8d (my Amazon Storefront collection)
Dial these in, and you’ve got it.
Sources – For deeper exploration, check out the sources below from peer-reviewed research, trusted health institutions, or other evidence-based articles:
- American Heart Association. (2022, June 7). Tiny sprouts provide big nutrition. https://www.heart.org/en/news/2022/06/07/tiny-sprouts-provide-big-nutrition
- Boeing, H., Bechthold, A., Bub, A., Ellinger, S., Haller, D., Kroke, A., Leschik-Bonnet, E., Müller, M. J., Oberritter, H., Schulze, M., Stehle, P., & Watzl, B. (2012). Critical review: Vegetables and fruit in the prevention of chronic diseases. European Journal of Nutrition, 51(6), 637–663. https://doi.org/10.1007/s00394-012-0380-y
- Fahey, J. W., Zhang, Y., & Talalay, P. (1997). Broccoli sprouts: An exceptionally rich source of inducers of enzymes that protect against chemical carcinogens. Proceedings of the National Academy of Sciences, 94(19), 10367–10372. https://doi.org/10.1073/pnas.94.19.10367
- Gan, R. Y., Lui, W. Y., Wu, K., Chan, C. L., Dai, S. H., Sui, Z. Q., & Corke, H. (2017). Bioactive compounds and bioactivities of germinated edible seeds and sprouts: An updated review. Trends in Food Science & Technology, 59, 1–14. https://doi.org/10.1016/j.tifs.2016.11.010
- Hung, P. V., Hatcher, D. W., & Barker, W. (2011). Phenolic compounds and antioxidant capacity of sprouted grains. Food Chemistry, 126(2), 459–465. https://doi.org/10.1016/j.foodchem.2010.11.015
- Medanta. (n.d.). Sprouts: Raw vs cooked—Nutrition value and health benefits. https://www.medanta.org/patient-education-blog/sprouts-raw-vs-cooked-nutrition-value-and-health-benefits
- Schlemmer, U., Frølich, W., Prieto, R. M., & Grases, F. (2009). Phytate in foods and significance for humans: Food sources, intake, processing, bioavailability, protective role and analysis. Molecular Nutrition & Food Research, 53(S2), S330–S375. https://doi.org/10.1002/mnfr.200900099
- Zhang, Y., Talalay, P., Cho, C. G., & Posner, G. H. (1992). A major inducer of anticarcinogenic protective enzymes from broccoli. Proceedings of the National Academy of Sciences, 89(6), 2399–2403. https://doi.org/10.1073/pnas.89.6.2399
- U.S. Food and Drug Administration. (2023). Raw sprouts: What you need to know. https://www.fda.gov/food/food-safety-education/raw-sprouts-what-you-need-know
- Centers for Disease Control and Prevention. (2024). Sprouts: What you should know. https://www.cdc.gov/foodsafety/foods-linked-illness.html
